Monday, February 16, 2015

Homemade Almond Butter

Today is National Almond Day! We made homemade almond butter to celebrate. Homemade nut butters are so easy to make and can be so much cheaper than store bought, especially almond butter. All you need to do is put almonds in a food processor and turn it on! It is that easy! We used unsalted roasted almonds, but you can use salted if you want. We just wanted to be able to control the amount of salt that was in our almond butter.
Once your almonds have been processing for a little, they will look like this. As you can see, some of the ground almonds will get stuck to the sides, so you might have to scrape down the sides.
 Then the almonds will start to look crumbly like this. They are starting to turn to almond butter!!!
 Next, it will turn into a ball and roll around your food processor. Don't worry it will turn into almond butter soon. Almost done!
 Yay! It finally turned into almond butter! 
 Homemade almond butter is totally customizable. Usually we just throw some almonds into our food processor, but you could put anything you want in your almond butter. Sometimes we will add some salt or maple syrup.
Almond butter is so versatile and can be used in place of peanut butter. Here we had it with carrot sticks. What is your favorite way to eat almond butter? Do you prefer peanut butter or almond butter?

Saturday, February 14, 2015

Valentine's Day!

Happy Valentine's Day! Do you have any plans for today? (Baking for us!) We made two things for Valentine's Day, cut out cookies and blondies. But first, lets talk about the sugar cookies!

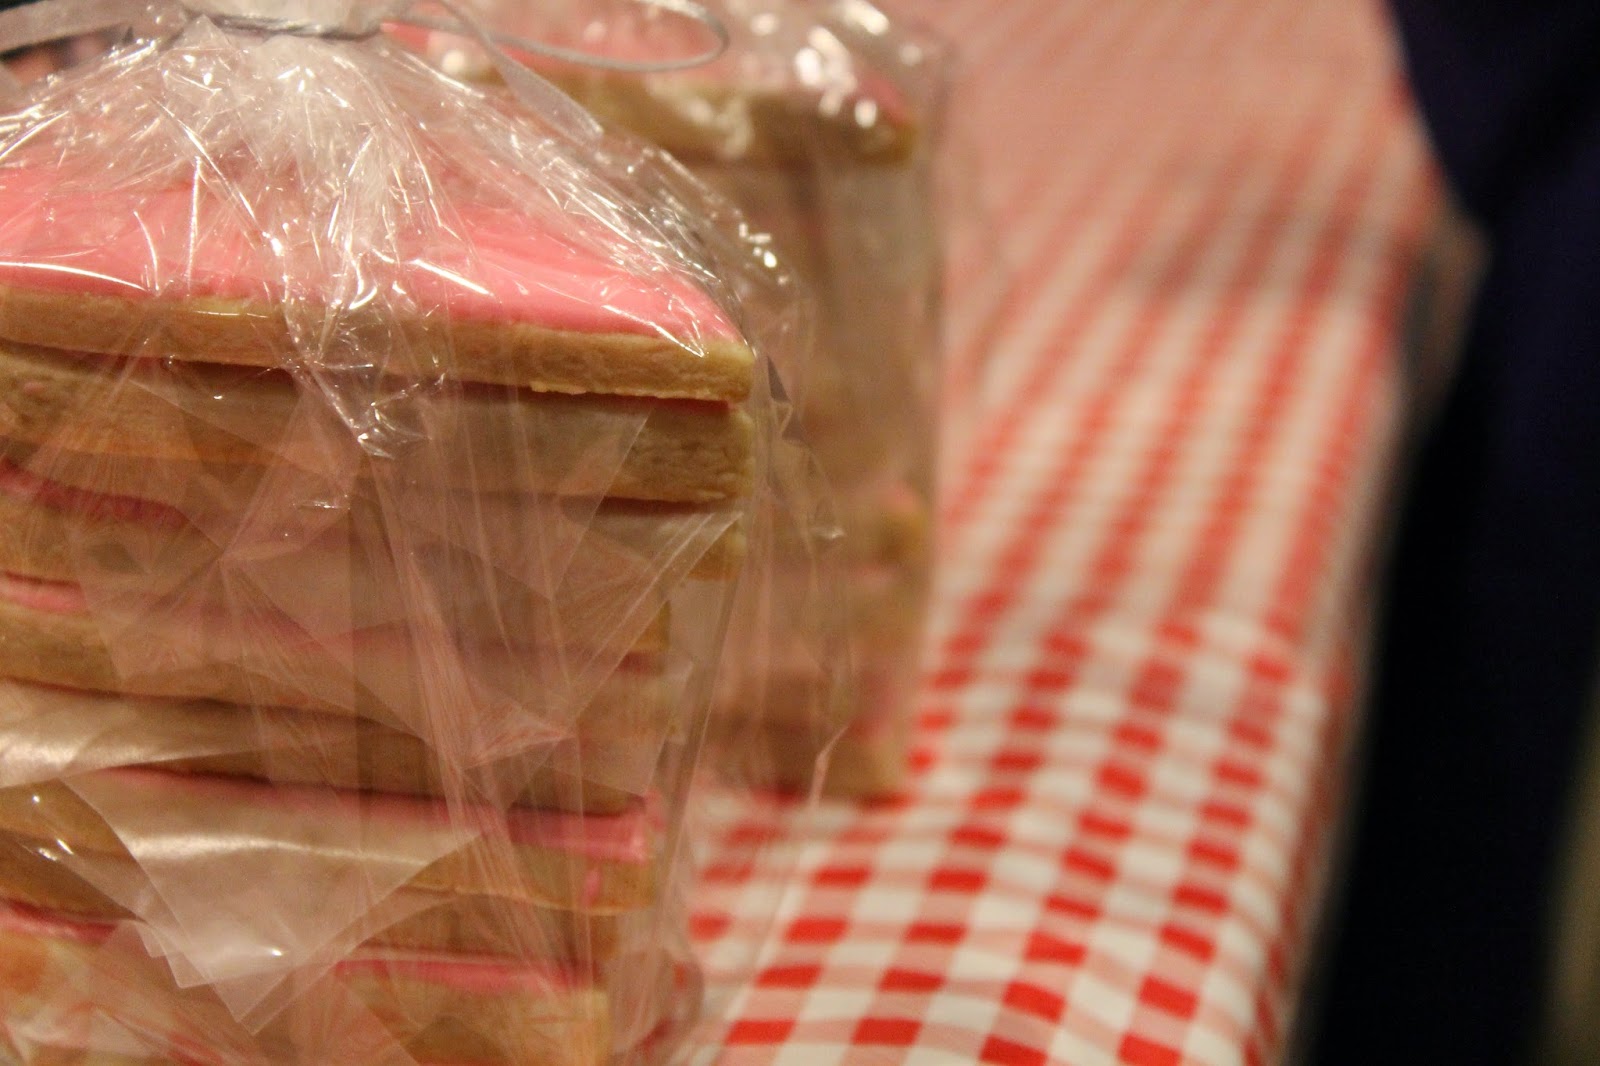
We made these cookies so that we could give them out to some friends, and this is how we packaged them to give them out.We decided on pink hearts instead of red, because we had no red food coloring... All of our friends loved these cookies and thought they were super cute. Want to impress someone special? Just make sugar cookies like these, they are sure to impress anyone!


We used royal icing on ours, but buttercream or any frosting you want would still be delicious! When we packaged these cookies, we put wax paper in between each layer to make it have more of a store bought feel. It definitely worked! 

Next we made blondies!We didn't ave a recipe for these, so we looked one up and decided to use the American Test Kitchen recipe that we found. We didn't really like this recipe, so we are going to try another recipe.(that's what we are baking today!) so we will definitely let you know how those turn out! (They tasted good but took forever to bake and turned out kind of dry)


Once we had them all cut out, we decided to make them a little bit more towards the Valentine's Day theme. So, we put heart shapes on the top of them! We did this by taking a small heart shaped cookie cutter and putting it into the top, but not all the way through the blondies.


We had some royal icing leftover from our cookies, so we thought it would be cute to fill in the hearts with the icing, and this was the result!
Have a happy Valentine's Day!

Did you bake something for Valentine's Day? What did you bake?

Monday, February 9, 2015

Homemade Peppermint Patties

Our oven is being a little temperamental and only works about half of the time (we have no idea what is wrong with it). So this week, we made another candy recipe (and will be making candy until our oven is fixed!). This weeks recipe is much harder (almost impossible) to mess up but is so darn delicious!

It tastes so much like a store bought peppermint patty, but even better we think! As little kids, our great Aunt would set peppermint patties out in little candy dishes, so every time we would go to her house, we would eat as many as we could, and then smuggle more home with us (we still smuggle them out when we go over). Obviously we could go and buy our own, but it's more fun to just steal them from our great Aunt. (by the way I'm pretty sure she always knew we stole them and didn't care, but as kids we didn't know that).


Then, to our great delight, our Grandma started to put them out, so we ate those (and smuggled them) every time we went over. So when we were looking for candy to make, these were the obvious choice!


Why heart shaped peppermint patties? Valentines day is coming up, so heart shaped would look cute around this time! We think that these patties are the perfect way to say "I love you" to your sweetheart this valentine season.


As you can tell from these pictures, our peppermint patties aren't perfectly smooth and covered with chocolate, but we think that it is cute how each one is a little bit different then the others.


We found this recipe on Pinterest and we hope that you enjoy it as much as we do! What are you making for valentine's Day this year?

Ingredients:
  • 2 1/2 cups powdered sugar, divided
  • 1 1/2 Tablespoons light corn syrup
  • 1 Tablespoon +2 teaspoons water 
  • 1/2 teaspoon peppermint extract
  • 1 Tablespoon coconut oil (or vegetable shortening)
  • 10 ounces bittersweet chocolate chips or 10 ounces bittersweet chocolate, coarsely chopped
  • 1-2 teaspoons coconut oil (or vegetable shortening)
Directions:

    1. In the bowl of a stand mixer, combine 2 1/4 cups powdered sugar, corn syrup, water, peppermint extract, and coconut oil. Beat on medium speed until just combined. If mixture is too dry, add a few drops of water at a time until mixture begins to come together.
    2. Using some of the remaining 1/4 cup of powdered sugar, dust your work surface. Remove the peppermint mixture from your bowl and place on the powdered sugar. Knead the mixture until it is smooth.
    3. Roll your peppermint mixture between two pieces of parchment paper, until it is about 1/8-1/4 inch thick. Transfer the peppermint mixture to the freezer and allow to freeze for at least 15 minutes.
    4. After 15 minutes, remove your peppermint mixture from the freezer. Remove the first piece of parchment paper and dust the peppermint mixture with powdered sugar, replace the parchment paper. Flip the peppermint mixture and repeat with the other piece of parchment paper.
    5. Take your 1-inch cookie cutter and cut as many rounds or squares as you can. Transfer them to a parchment lined cookie or baking sheet. Re-roll the remaining peppermint mixture and repeat the process. Once you have cut as many patties as you can, place them in the freezer. Allow them to freeze for at least 45 minutes.
    6. Place coconut oil and chocolate in a medium sized microwave safe bowl. Microwave 30 seconds on high, remove from microwave and stir. Return to the microwave and microwave in 10-15 second increments, stirring each time. Continue until chocolate is completely melted.
    7. Remove peppermint patties from the freezer. Working with one patty at a time, place the patty in the melted chocolate. Using a fork, flip the patty to coat it on all sides. Allow the excess chocolate to drip off. Place peppermint patty back on the parchment lined baking sheet. Repeat with the remaining patties. Once completed with all peppermint patties, place baking sheet back in the freezer or refrigerator. Once chocolate has set completely, place peppermint patties in an air-tight container and keep in the refrigerator or freezer.

    Monday, February 2, 2015

    Peanut Brittle

    Since we succeeded in making caramels at Christmas (yay!), we thought it might be a good time to venture into the scary world of candy making... Courage in hand and lessons learned (at first we had the increments on our candy thermometer wrong so we way over cooked our caramel!), we opened up the candy book we got last year for Christmas(we have only made the caramel recipe because we don't want to mess it up) and found the recipe for peanut brittle. Here is the delicious and addicting result!
     This peanut brittle could not be easier! We made it twice and didn't mess up either batch (amazing since we have a terrible time with any kind of candy making).
     Be sure to spread it when you pour it into the pan. Our first batch turned out a little thicker than most peanut brittle.
                                          
    We have an old fashioned candy thermometer where telling the temperature is a little bit of guess work and a little bit of talent. An instant read, digital candy thermometer would be nice to have. 
     We also made this recipe with pecans (our favorite nut). It tasted even better than the peanut brittle! The pecans turn all toasty and really shine through! This is definitely a pecan lovers delight. We love to go through the bag and pick out the pieces with the most amount of nuts. :) 

     The recipe we used comes from a book called Chocolates and Confections. It was written be Peter Greweling who, at the time of its publication in 2010, is a professor at the Culinary Institute of America. Here is the recipe that turned the candy illiterate into candy makers: 

    Ingredients:
    • 1 lb (2 cups) sugar
    • 1/2 cup water
    • 1 cup light corn syrup
    • 1 lb (3 cups) unsalted whole peanuts or coarsely chopped pecans*
    • 1 tsp salt
    • 2 Tbsp Butter, soft
    • 1 1/2 tsp vanilla extract
    • 1 1/2 tsp baking soda
    Directions:
    1. Lightly oil a 10x15-inch pan (we used a cookie sheet with sides. We have no idea what size it is....). Lightly oil an offset palette knife.
    2. Combine the sugar, water, and corn syrup in a 4-quart saucepan. Bring to a boil, stirring constantly with a heat resistant rubber spatula. Cover and boil for  minutes.
    3. Remove the cover, insert a thermometer, and cook without stirring to 240 degrees Fahrenheit.
    4. Add the peanuts and cook while stirring to 320 degrees Fahrenheit, or until the batch is light brown.
    5. Remove from the heat; mix in the salt, butter, vanilla, and baking soda thoroughly. 
    6. Pour onto the prepared pan and spread to the edges using the oiled palette knife.
    7. Allow to cool to room temperature. Break into desired sized pieces (and don't cut yourself on the sharp edges after it breaks like Ashley did....) Store sealed in an airtight container.
    What's your favorite kind of candy to make? What candy should we try next?